
July 27, 2009
Become a Fan on Facebook!
I now have a fan page and gallery on Facebook! If you have a facebook account, stop by and become a fan. There may be special fan-member discount codes...
July 26, 2009
Customs for Melinda and Breastfeeding!
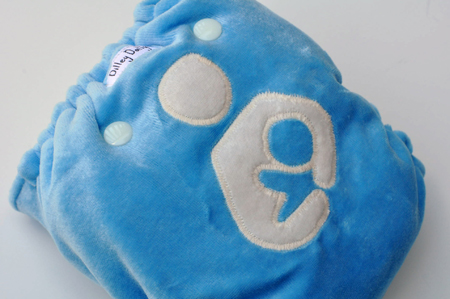
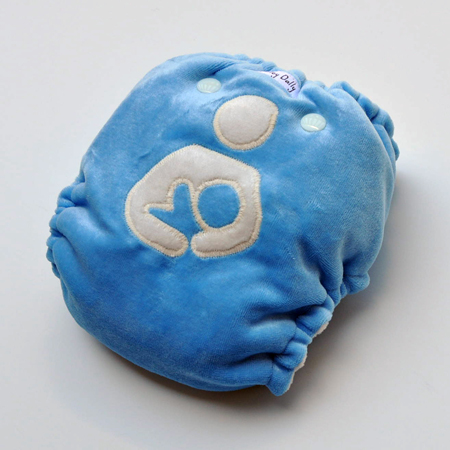
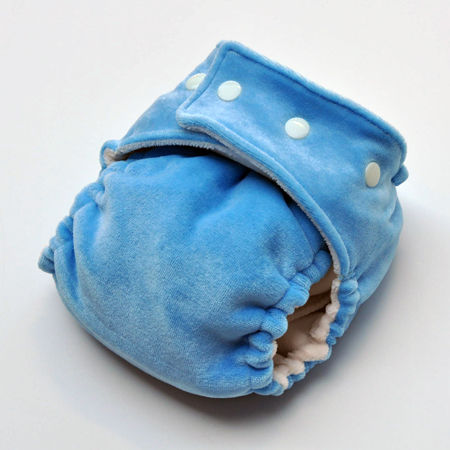
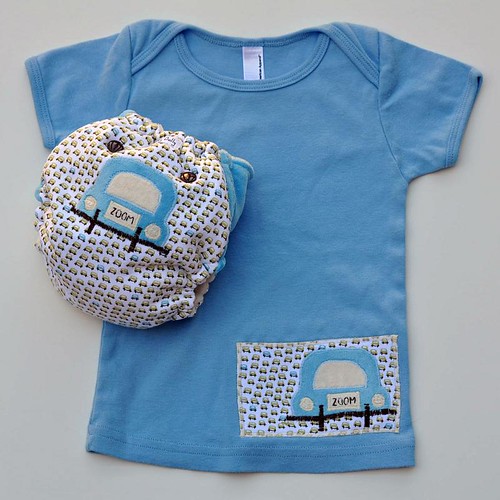
August 1-7th is National Breastfeeding week. I made one of these for a super lactavist, and I also made one for my store :) It's sky blue OBV with the symbol embellished with natural OBV. So squishy soft!
This is a custom for Melinda, one of my best customers :) Enjoy!
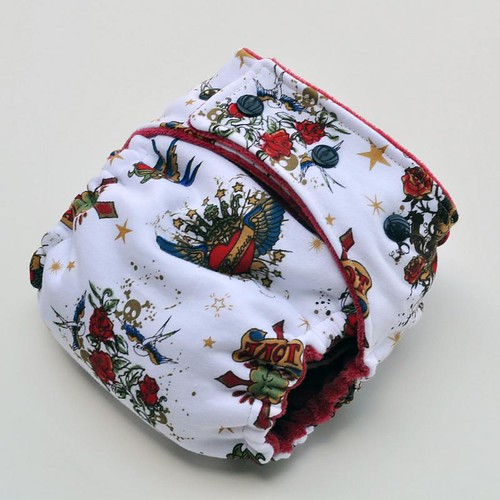
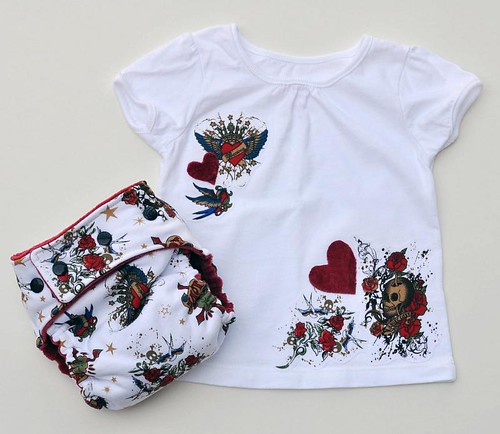
This is a custom for Melinda, one of my best customers :) Enjoy!
July 16, 2009
A rather tardy update!
Hello all! I'm going to be stocking on Monday July 20th, be sure to check it out! On top of some regular diapers, I'm going to have an extra special auction. Here's a sneak peak:
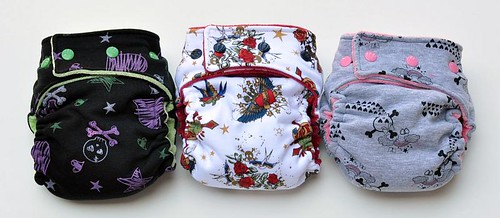
And just for fun, here are some pictures of recent customs I've finished!

And just for fun, here are some pictures of recent customs I've finished!
June 11, 2009
Stocking on Sunday!
Big stocking on Sunday! Including more custom slots :) Feel free to go check it out, and spot as much as you want!
June 08, 2009
Customs for Leah and Kyleigh's birthday's!
I just finished up a couple more customs, and thought I would share.
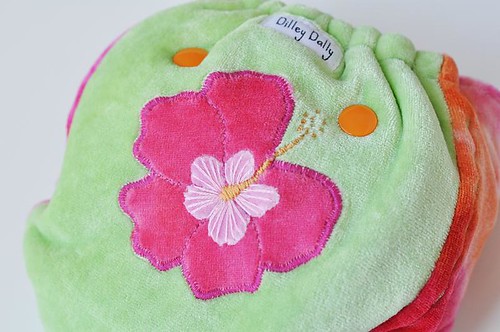
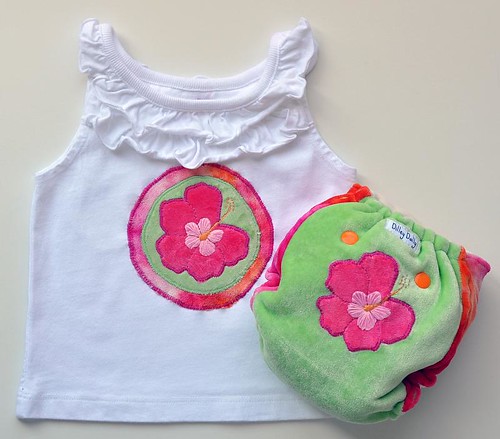
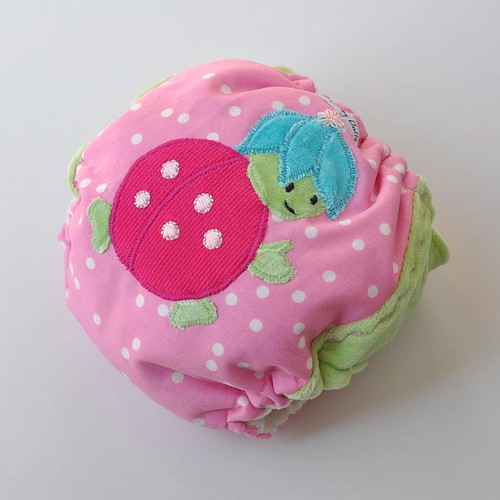
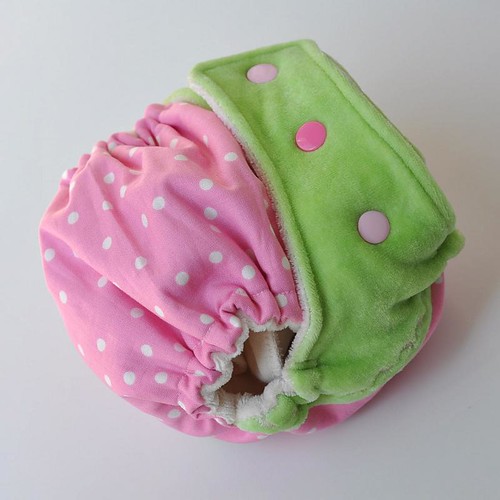
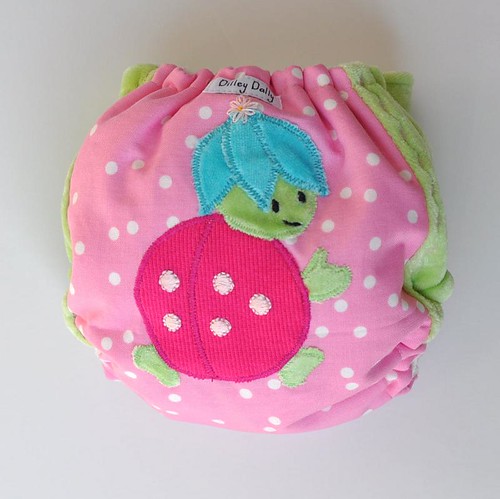
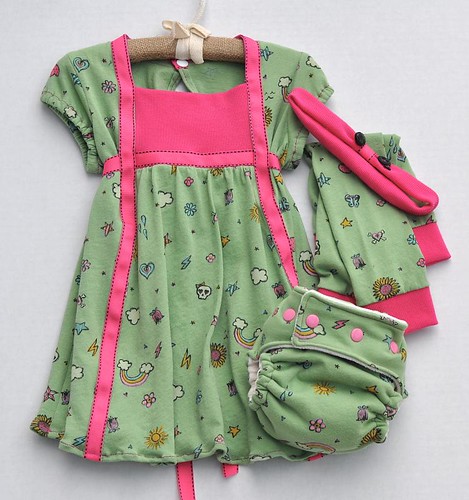
This first one is for baby Leah's birthday. The theme is bugs, and she love pink and green. This is what we came up with, and it's so super cute!

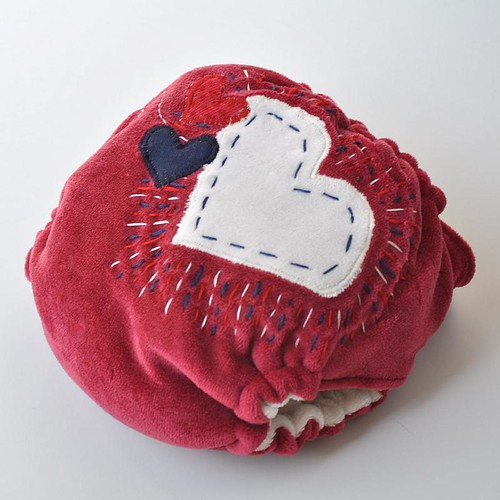
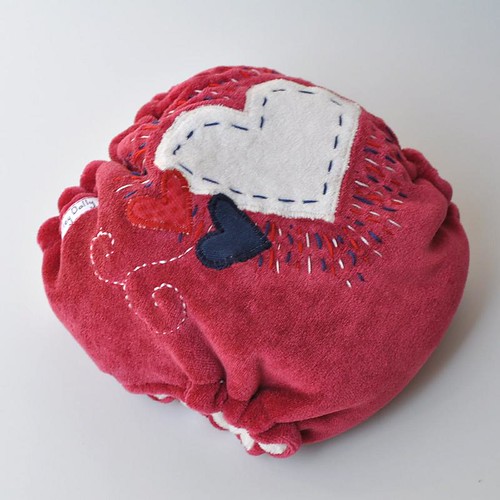
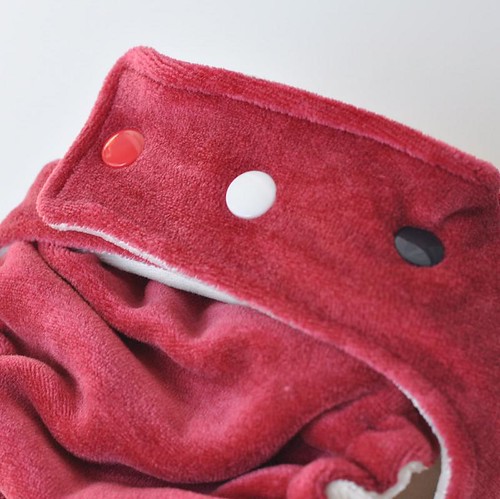
And little Firecracker Kyleigh needed a 4th of July diaper, so this squishy soft creation of dark red bamboo velour is what we did!

And congratulations to Dee! Winner of the Dilley Dally diaper giveaway hosted by The Creative Mama!
Also, check out my fabric gallery, I've added a few more fabrics over the last week :)
(Sorry the photos are off-center and cropped, I used a pre-made template but I need to fiddle with it some more to make the table wider, and I'm not a html expert!)
This first one is for baby Leah's birthday. The theme is bugs, and she love pink and green. This is what we came up with, and it's so super cute!
And little Firecracker Kyleigh needed a 4th of July diaper, so this squishy soft creation of dark red bamboo velour is what we did!
And congratulations to Dee! Winner of the Dilley Dally diaper giveaway hosted by The Creative Mama!
Also, check out my fabric gallery, I've added a few more fabrics over the last week :)
(Sorry the photos are off-center and cropped, I used a pre-made template but I need to fiddle with it some more to make the table wider, and I'm not a html expert!)
June 01, 2009
Guest Blog and GIVEAWAY!
That's right, I wrote a guest blog for Angie over at The Creative Mama all about cloth diapering! At the end, there are four different ways to enter to win a free Dilley Dally Diaper! So head on over and check it out!!!
May 31, 2009
Want to see some customs?
I just had a big round of customs, so I thought I would share. These are all one of a kind!
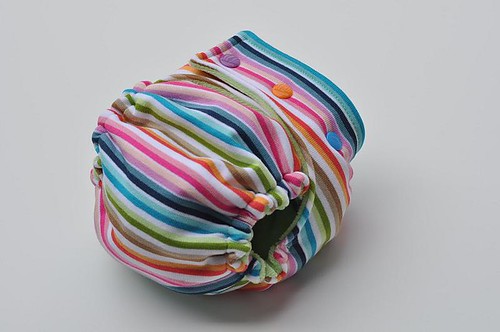
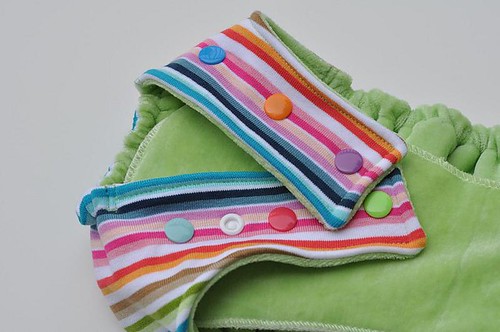
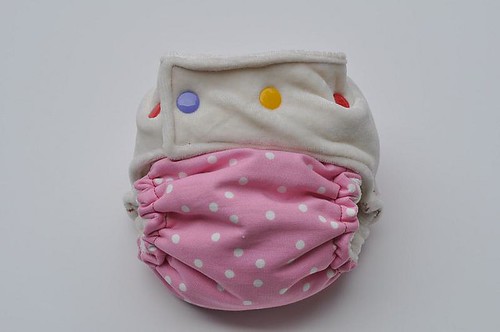
This first one is "rainbow shine" fabric that the customer gave me to make a single diaper of. She requested rainbow snaps to match, and a special lime OBV inner. I think it turned out great!
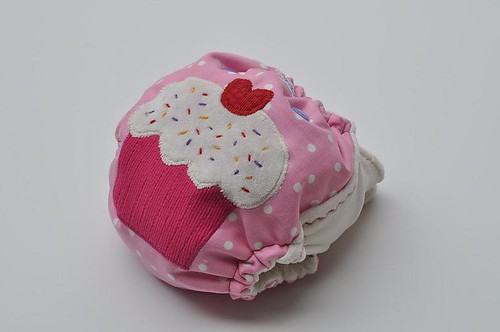
This next one is my first "birthday" diaper. This diaper is custom embellished to match little C's first birthday party decorations. So when it comes time for cake, she'll be naked in style, and the messy eating can commence! The snaps on the front coordinate with the sprinkle colors. The center panel is a woven fabric, so the wings are made of OBV to keep the fit nice and stretchy. The sprinkles are hand sewn on, and a little bit of red embroidery tops the whole thing off!
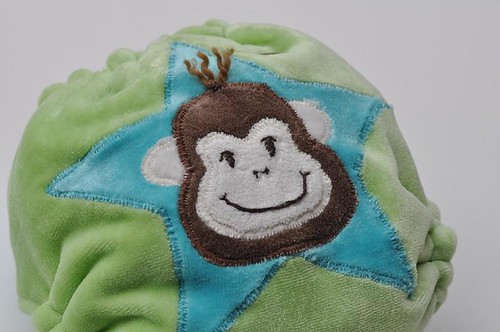
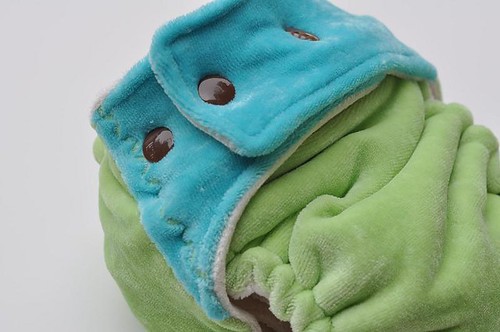
This last one is going to a very special creative mama for her special little boy L's first birthday. They call him monkey, so of course he needed a custom monkey diaper! The body is made of all OBV, so it's super soft and squishy. The body is made of lime and turquoise OBV, with brown and natural to make up the monkey. I hand embroidered the monkey's face on, and then put on some lime embroidery to complete the look. Oh, and the monkey just HAD to be sporting a little wool mohawk, just like little L had before his first haircut!
If you're interested in my custom diapers, there are a few spots available on my cart at www.dilleydally.com!
This first one is "rainbow shine" fabric that the customer gave me to make a single diaper of. She requested rainbow snaps to match, and a special lime OBV inner. I think it turned out great!
This next one is my first "birthday" diaper. This diaper is custom embellished to match little C's first birthday party decorations. So when it comes time for cake, she'll be naked in style, and the messy eating can commence! The snaps on the front coordinate with the sprinkle colors. The center panel is a woven fabric, so the wings are made of OBV to keep the fit nice and stretchy. The sprinkles are hand sewn on, and a little bit of red embroidery tops the whole thing off!
This last one is going to a very special creative mama for her special little boy L's first birthday. They call him monkey, so of course he needed a custom monkey diaper! The body is made of all OBV, so it's super soft and squishy. The body is made of lime and turquoise OBV, with brown and natural to make up the monkey. I hand embroidered the monkey's face on, and then put on some lime embroidery to complete the look. Oh, and the monkey just HAD to be sporting a little wool mohawk, just like little L had before his first haircut!
If you're interested in my custom diapers, there are a few spots available on my cart at www.dilleydally.com!
May 30, 2009
Exciting new things!
Two diapers sold locally at Portable Kid (yay!) so I'm working on more stock for that store as well as a few more things for my instock store.
Right now I'm finishing up my first two custom birthday diapers. Hopefully I'll be able to post pictures of them soon. I'm really excited about being able to offer them.
I also got my first round of feedback back on my Dreamer overnight diapers. I think there's a bit more tweaking that needs to happen. Right now they're great for my light overnight wetter (he's heavy during the day, but not too bad at night), but they don't work for co-sleepers who nurse all night :)
Oh, and stay tuned... I have something super exciting to post about on Monday! There may even be a giveaway involved... Ok, there is a giveaway involved :)
May 14, 2009
Back at it
We're finally feeling better here, so I've been working on diapers again! This morning I'm dropping off diapers to be sold at one of our local stores, then I'll be back at it. Right now I'm working on a diaper that I'm doing for a trade as well as a custom diaper. The mama wanted a diaper for her daughter to wear when she stripped her down to eat cake for her first birthday. This diaper is so stinkin cute... I'll post pictures when it's done. I may have to make more to sell, or offer them as customs. When the diaper is fun to work on it's easier to get it done!
May 01, 2009
I'm Behind
My goal is to stock the 1st and 15th of each month. Well, that's not going to happen this time, oops! I have a bunch of diapers in progress, but we're still sick at our house. I think the crud is almost gone. I didn't want to work on diapers and pass on this ick via the mail, so once I'm feeling like it's safe to sew again, I'll do so. It's been an interesting two weeks!
April 22, 2009
Snaps are here!
My snaps came in... so I can continue working on diapers again! Oh, and shipping from China only took 8 days. Incredible!
I also got asked to be a guest writer on a fun blog... stay tuned for details :)
I also got asked to be a guest writer on a fun blog... stay tuned for details :)
April 20, 2009
In progress
Since I'm still new to the world of being a full time WAHM, I'm still getting things under control. I had weighed my snap sockets to see how many more diapers I could do, and thought I had plenty but ordered more anyway. My scale is great for packages, but I think snaps might be a bit too light, because my estimate was WAY off! So now I'm working on a bunch of diapers presnaps so that I can still be working, but I can't get any of them done until my order of snaps gets here from China.
The good news is my first two Dreamers are almost ready for testing! I used odds and ends of various snap sockets to complete them. One of them I will be testing, and the other I'm going to test locally first. Once I get a better idea of any changes I need to make I may open up a few tester Dreamers in my shop. Pretty exciting stuff! I created a new soaker design which lets you customize the absorbency in the middle (for girls) or the front (for boys) with 14, 17, or 20 layers depending on how you fold it. I think it's pretty neato.
Also, my current fabrics are updated on my flickr account. I do have a few more individual cuts that are not posted. They may show up for an online stocking, or I may sell them locally. I have 5 new fabrics on order as well... more girly prints and another robot. I cannot resist robots!
April 18, 2009
Customs
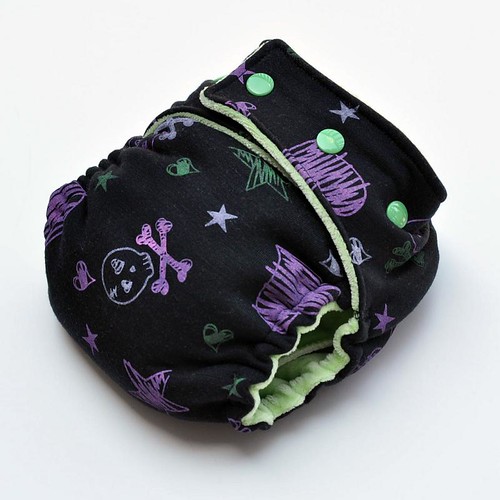
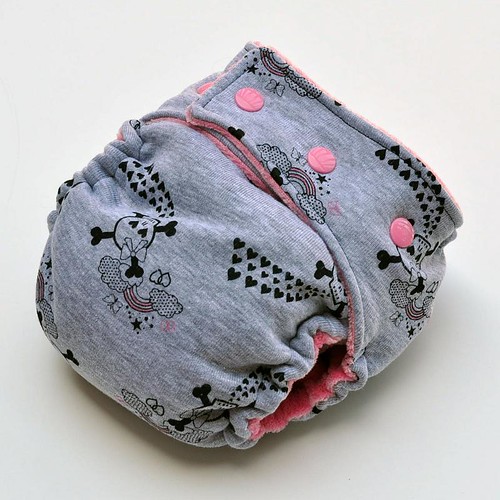
Occasionally I do custom orders for customers. The most recent one was for Melinda, with some "Rockstar" fabric she sent me. It turned out super cute! I love getting the chance to do girly things every once and a while.
April 16, 2009
Update!
Dilley Dally diapers opened on April 1st, and I just completed my first round of customs. I'm running low on supplies, and they have been reordered :)
For now I'm working on designing a soaker for a "Dreamer" nighttime version of my OS diaper. I also have a couple of local orders to take care of before I open up any more custom spots.
March 12, 2009
Wetbag Tutorial
My friend Michelle asked me how to make wetbags. I decided to share with everyone and make a tutorial!
Click the "Read More" button for the whole thing, including detailed photos
Materials:
Woven Print for outside of Wetbag
PUL for inside of wetbag
Zipper (at least one inch longer than the shortest side of the wetbag)
Thread
Sewing Machine with zipper foot
Optional: Snaps and a snap press for handles that can be opened
Optional: Serger for inside of bags
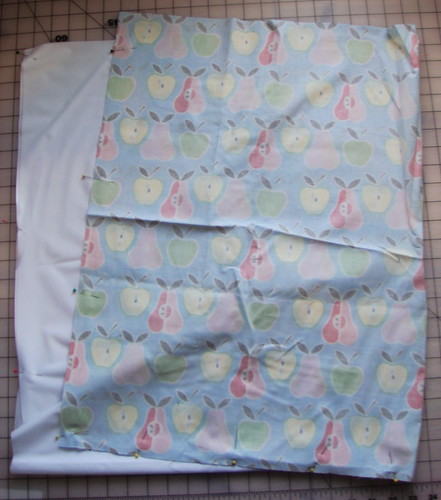
Start by getting your fabric ready. Choose a cute print (usually in cotton, but since this is a wetbag polyester is ok too). For wetbags I use woven fabrics, since stretchy fabrics can be a pain to work with sometimes. Then pick your dimensions. This varies for everyone. Some "small" wetbags are the same size as other's "mediums" and so on, so I just pick the size I want it to be. For this one, I wanted a big one for a weekend trip out of town. I'm using plain white PUL and a fun apple and pear print.
A note about PUL, you can use 1mil or 2mil. I have 1mil that I'm using here, but some people prefer 2mil.
Cut your fabrics so you have two pieces the size that you want (an outside bag of print and an inside bag of PUL all the same size). I'm using the fold to my advantage, but you don't have to. If your print is directional (like my apples are all going the same way) make sure that both pieces are going the same direction. Pin the fabric right sides together on three sides, leaving one of the short sides open. For the PUL, the "right" side is the shiny side.
If you want a handle, cut a piece of the woven fabric roughly 12 x 4 inches. Fold in half lengthwise and pin. If you're doing a closed loop handle (no snaps) sew along the long side. If you're doing an open handle (with snaps) sew along the long side and one of the short sides. Turn right side out and fold over. Pin again. This will add some thickness to the handle so it doesn't get all scrunchy when washed.
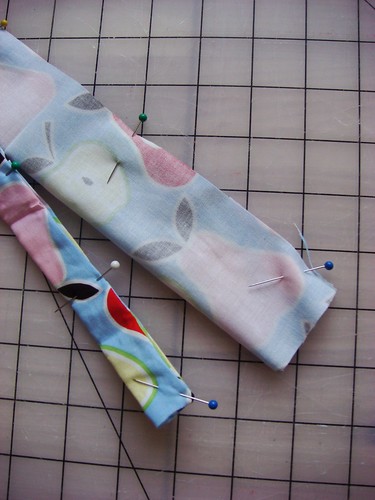
Using your sewing machine, topstich the handle. Fo closed loop do both long sides, and for open loop do both long sides and the closed end to make a nice finished edge.
Next pin the handle in place about an inch below the open edge. For closed loop make the loop now so BOTH raw edges are pinned in. For open loop, only pin in the unfinished edge.
Now you can sew the three edges of both the inside and the outside of the bags. When you sew the print, reinforce your handle. I use the reverse on my sewing machine and just go to town going back and forth over the handle inside the seam allowance. These bags can get heavy, and I want it to hold! This may get a bit thick, so go slowly. It doesn't have to be pretty, it won't show, but you'll be glad of it later! I also make sure to reverse stitch and reinforce all corners.
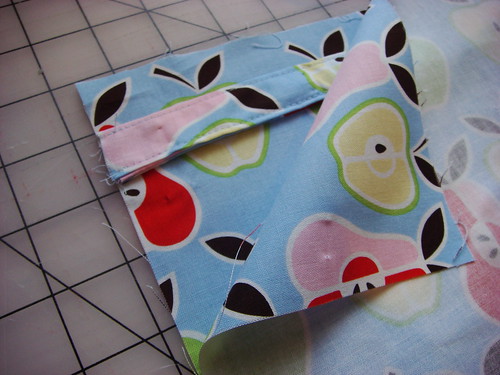
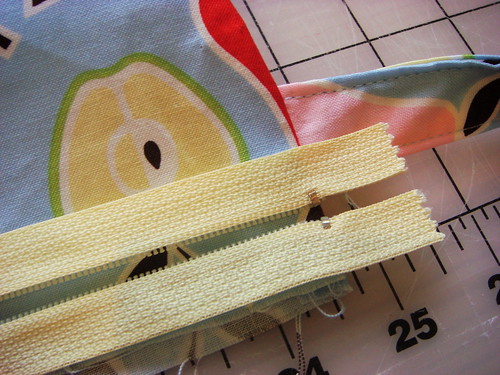
Next, turn the outside of the bag right side out. You do NOT turn the PUL bag, you put it into the print bag, so all the seams are hidden inside. I go ahead and put the PUL bag in now, and just ignore the top of it while I do the first part of the zipper. This picture shows what the two bags should look like before adding the zipper.
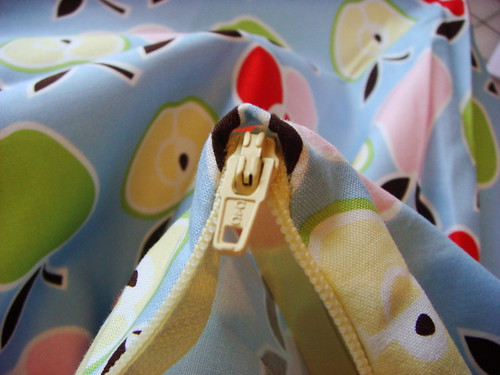
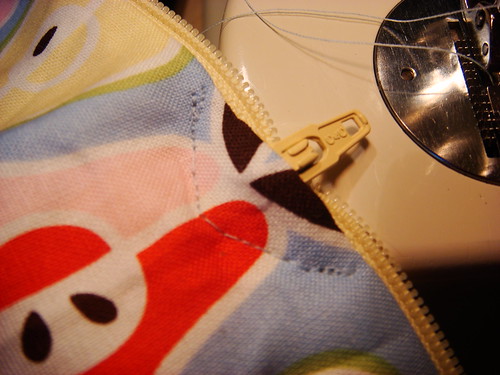
Now comes the tricky part. The zipper. Take your zipper out of the package and unzip it to the end (this should go farther than the fabric by at least an inch). Take the two open ends and lay them upside-down on top of the wetbag, with the loose ends on the same side as the handle.
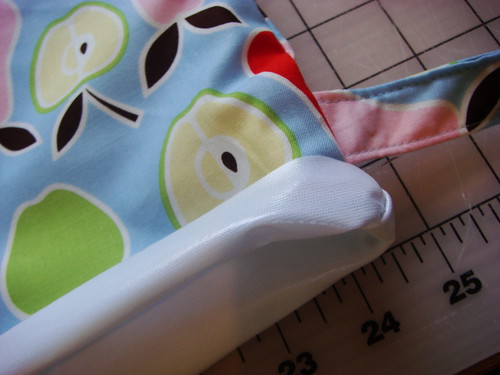
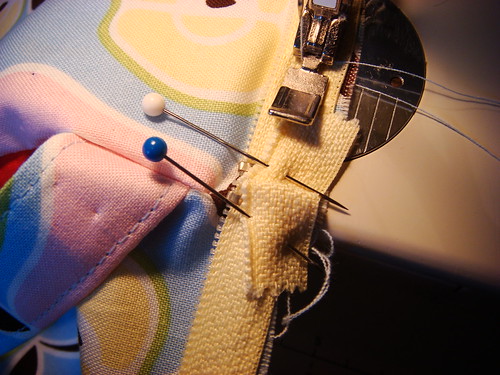
Fold the extra at the end down and start pinning the bottom zipper to the bag. I have a hard time explaining this in words, but hopefully this picture will help. If you turn what you just pinned, it should look similar to the finished edge of the zipper will look like after topstitching.

Pin until half an inch from the other end of the zipper. Next flip the zipper so that it's not twisted but the right sides are together on the other side of the bag as well. This looks awkward, and it may take several tries. If you're having trouble, pin down the side in a few places and flip it to see if it seems correct. The long tail at the end will get tucked into the bag, and the zipper pull should not encounter any twists. If for some reason you DO get a twist (heaven forbid) after it's sewn, there is a fix but it's not fun.
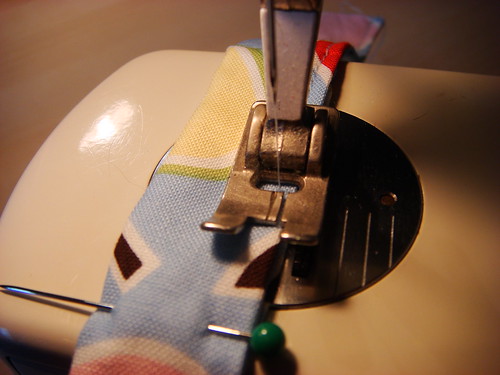
I usually start sewing from the loose ends. I do it this way so I get them to line up nicely. Put the zipper foot on your machine, with the needle on the left side of the foot. I make sure to tack down the folded down edges well so they don't get in the way of the zipper when the bag is done. Sew as close to the zipper as you can, until about half an inch from the other end of the bag.
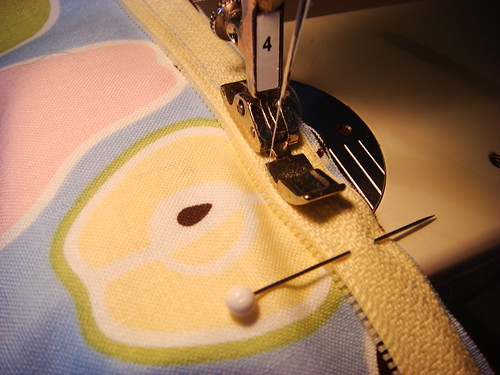
Skip the tail of the zipper, and start again a half inch in on the other side. This will leave about a one inch gap at the zipper tail.
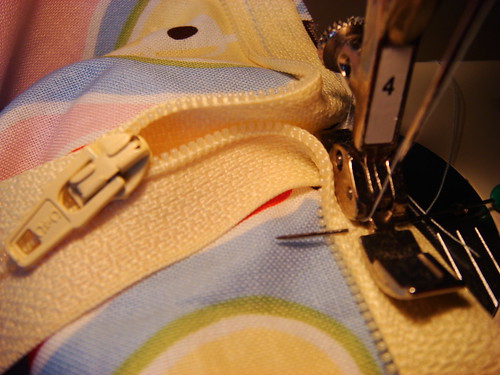
Now flip the zipper and tuck the tail into the open gap. If it's twisted, cut off the end of the zipper and pull off the zipper pull. Fix the twist and carefully put the zipper pull back on. Try it out a few times to make sure you have it centered properly. If you had to cut your zipper you should be fine, it will be closed again soon. Arrange the zipper pull so that it's hanging out at the edge of the bag. I have about 3 inches of extra, but no one will ever see it, so I just leave it.
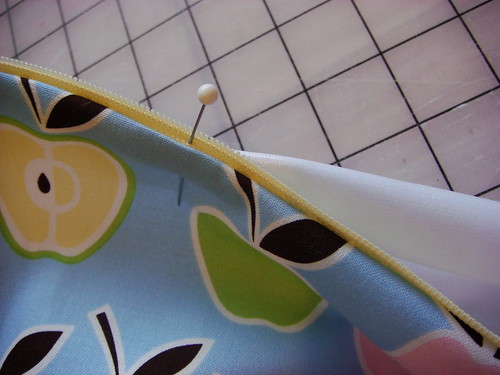
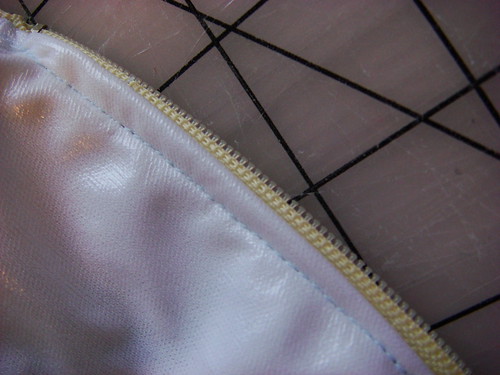
You're now going to retrieve the top of the PUL bag that's been hanging out inside. Turn the edge under (if you did both bags the same size, this will probably be about 1" long) and start pinning it to the underside of the new zipper. I again start at the loose edges so they line up nicely.
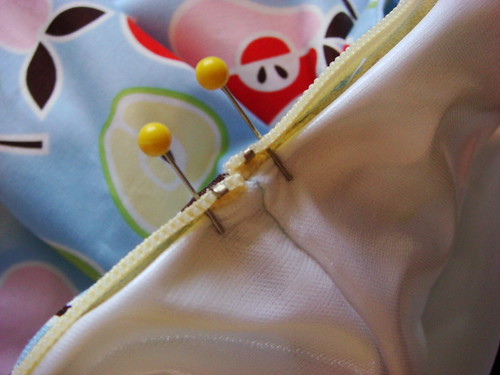
Continue pinning all the way around. I do as my mom always advise, and I "divide and conquer." I pin the loose ends of the zipper, then find the other sides and pin where the zipper pull is, then put those pins together and pin midpoints on the two sides, and go from there. You don't have to do it that way but it helps to eliminate any repinning because the PUL is a little bit stretchy.
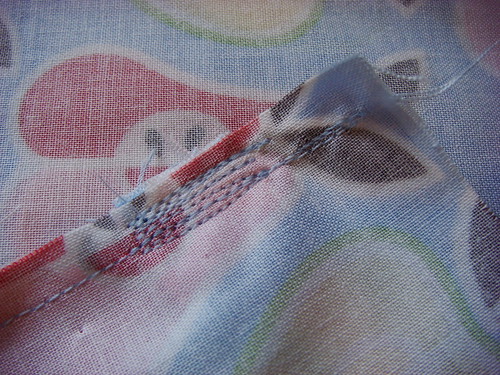
Time to start sewing again. This is the hardest part of the sewing, so go slow and be careful. Sew a V around the bottom of the zipper where the zipper pull is currently hanging out. I do this with my needle on the left hand side and only do the V to start with. Then if I mess it up I can rip it out and redo it.
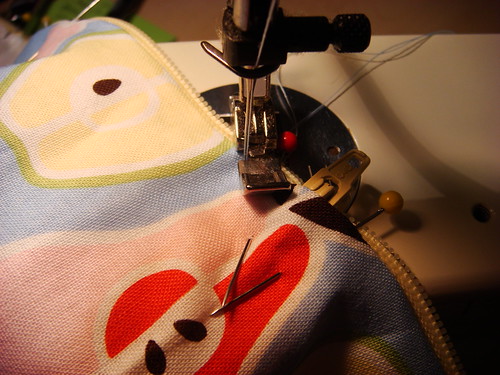
After that portion is done, move your needle to the right of the zipper foot, and topstitch the zipper so that the PUL is attached on the inside as well. I start at one side of the V and go all the way around.

If you're doing a closed loop wetbag, you're all done! If you're doing an open loop wetbag, apply your snaps, and then you're done!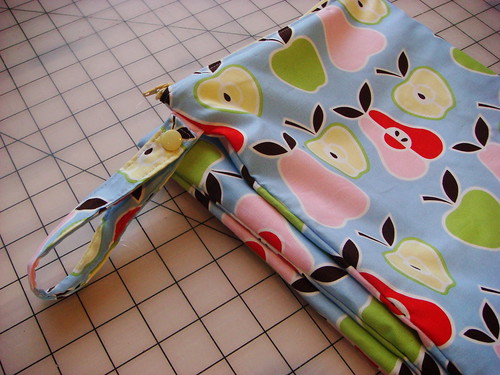
I hope you enjoyed this tutorial, and that it was helpful. Feel free to leave any questions in the comments, and I'll do what I can to help you out!
Click the "Read More" button for the whole thing, including detailed photos
Materials:
Woven Print for outside of Wetbag
PUL for inside of wetbag
Zipper (at least one inch longer than the shortest side of the wetbag)
Thread
Sewing Machine with zipper foot
Optional: Snaps and a snap press for handles that can be opened
Optional: Serger for inside of bags
Start by getting your fabric ready. Choose a cute print (usually in cotton, but since this is a wetbag polyester is ok too). For wetbags I use woven fabrics, since stretchy fabrics can be a pain to work with sometimes. Then pick your dimensions. This varies for everyone. Some "small" wetbags are the same size as other's "mediums" and so on, so I just pick the size I want it to be. For this one, I wanted a big one for a weekend trip out of town. I'm using plain white PUL and a fun apple and pear print.
A note about PUL, you can use 1mil or 2mil. I have 1mil that I'm using here, but some people prefer 2mil.
Cut your fabrics so you have two pieces the size that you want (an outside bag of print and an inside bag of PUL all the same size). I'm using the fold to my advantage, but you don't have to. If your print is directional (like my apples are all going the same way) make sure that both pieces are going the same direction. Pin the fabric right sides together on three sides, leaving one of the short sides open. For the PUL, the "right" side is the shiny side.
If you want a handle, cut a piece of the woven fabric roughly 12 x 4 inches. Fold in half lengthwise and pin. If you're doing a closed loop handle (no snaps) sew along the long side. If you're doing an open handle (with snaps) sew along the long side and one of the short sides. Turn right side out and fold over. Pin again. This will add some thickness to the handle so it doesn't get all scrunchy when washed.
Using your sewing machine, topstich the handle. Fo closed loop do both long sides, and for open loop do both long sides and the closed end to make a nice finished edge.
Next pin the handle in place about an inch below the open edge. For closed loop make the loop now so BOTH raw edges are pinned in. For open loop, only pin in the unfinished edge.
Now you can sew the three edges of both the inside and the outside of the bags. When you sew the print, reinforce your handle. I use the reverse on my sewing machine and just go to town going back and forth over the handle inside the seam allowance. These bags can get heavy, and I want it to hold! This may get a bit thick, so go slowly. It doesn't have to be pretty, it won't show, but you'll be glad of it later! I also make sure to reverse stitch and reinforce all corners.
Next, turn the outside of the bag right side out. You do NOT turn the PUL bag, you put it into the print bag, so all the seams are hidden inside. I go ahead and put the PUL bag in now, and just ignore the top of it while I do the first part of the zipper. This picture shows what the two bags should look like before adding the zipper.
Now comes the tricky part. The zipper. Take your zipper out of the package and unzip it to the end (this should go farther than the fabric by at least an inch). Take the two open ends and lay them upside-down on top of the wetbag, with the loose ends on the same side as the handle.
Fold the extra at the end down and start pinning the bottom zipper to the bag. I have a hard time explaining this in words, but hopefully this picture will help. If you turn what you just pinned, it should look similar to the finished edge of the zipper will look like after topstitching.
Pin until half an inch from the other end of the zipper. Next flip the zipper so that it's not twisted but the right sides are together on the other side of the bag as well. This looks awkward, and it may take several tries. If you're having trouble, pin down the side in a few places and flip it to see if it seems correct. The long tail at the end will get tucked into the bag, and the zipper pull should not encounter any twists. If for some reason you DO get a twist (heaven forbid) after it's sewn, there is a fix but it's not fun.
I usually start sewing from the loose ends. I do it this way so I get them to line up nicely. Put the zipper foot on your machine, with the needle on the left side of the foot. I make sure to tack down the folded down edges well so they don't get in the way of the zipper when the bag is done. Sew as close to the zipper as you can, until about half an inch from the other end of the bag.
Skip the tail of the zipper, and start again a half inch in on the other side. This will leave about a one inch gap at the zipper tail.
Now flip the zipper and tuck the tail into the open gap. If it's twisted, cut off the end of the zipper and pull off the zipper pull. Fix the twist and carefully put the zipper pull back on. Try it out a few times to make sure you have it centered properly. If you had to cut your zipper you should be fine, it will be closed again soon. Arrange the zipper pull so that it's hanging out at the edge of the bag. I have about 3 inches of extra, but no one will ever see it, so I just leave it.
You're now going to retrieve the top of the PUL bag that's been hanging out inside. Turn the edge under (if you did both bags the same size, this will probably be about 1" long) and start pinning it to the underside of the new zipper. I again start at the loose edges so they line up nicely.
Continue pinning all the way around. I do as my mom always advise, and I "divide and conquer." I pin the loose ends of the zipper, then find the other sides and pin where the zipper pull is, then put those pins together and pin midpoints on the two sides, and go from there. You don't have to do it that way but it helps to eliminate any repinning because the PUL is a little bit stretchy.
Time to start sewing again. This is the hardest part of the sewing, so go slow and be careful. Sew a V around the bottom of the zipper where the zipper pull is currently hanging out. I do this with my needle on the left hand side and only do the V to start with. Then if I mess it up I can rip it out and redo it.
After that portion is done, move your needle to the right of the zipper foot, and topstitch the zipper so that the PUL is attached on the inside as well. I start at one side of the V and go all the way around.
If you're doing a closed loop wetbag, you're all done! If you're doing an open loop wetbag, apply your snaps, and then you're done!
I hope you enjoyed this tutorial, and that it was helpful. Feel free to leave any questions in the comments, and I'll do what I can to help you out!
March 06, 2009
The things I do
This blog will be primarily for Dilley Dally Diapers, but I may throw in some other things from time to time as well. I have a personal blog, but I felt that my family may not appreciate my diaper business and my customers may not want to hear about my son eating cat barf. So now I have two blogs. Some readers may read both, and some may just do one or the other. I don't care either way, and there may be a little bit of overlap too. I may occasionally post tutorials on here as well. While I will mostly be selling my OS fitted diaper, I may occasionally offer up some of my other random crafts. One does need an occasional break from doing the same thing over and over again!
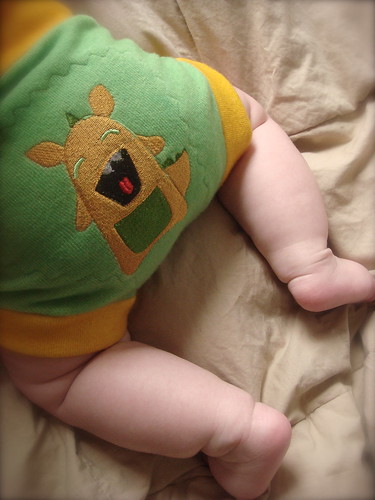
But first I want to show off some of the things that I have made for my son, Goomba.
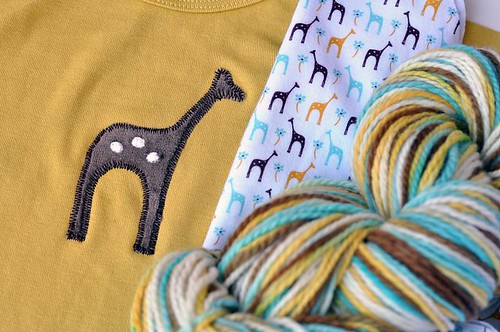
The first is a wool interlock soaker embroidered with the "Baxter" monster. I love it!
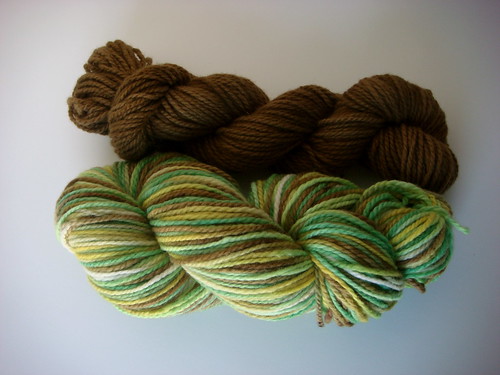
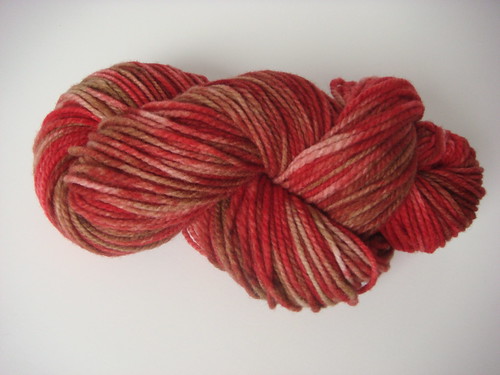
Next up is some yarn that I dyed. The first is Cestari fine merino that I call Avocado (with matching trim) and the second is some Blackberry Ridge Merino that has been kettle dyed. I'm calling it Chocolate and Strawberries.
I hope you all enjoy my blog! I look forward to posting to it more often as I create new and exciting things.
Subscribe to:
Posts (Atom)