
Click the "Read More" button for the whole thing, including detailed photos
Materials:
Woven Print for outside of Wetbag
PUL for inside of wetbag
Zipper (at least one inch longer than the shortest side of the wetbag)
Thread
Sewing Machine with zipper foot
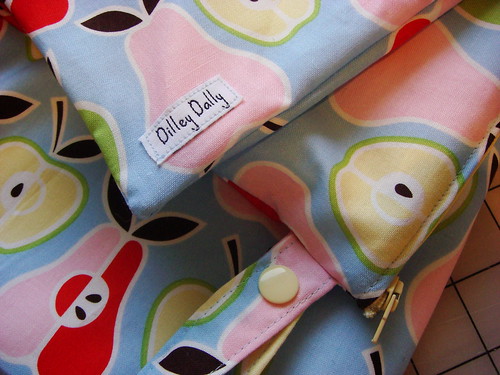
Optional: Snaps and a snap press for handles that can be opened
Optional: Serger for inside of bags
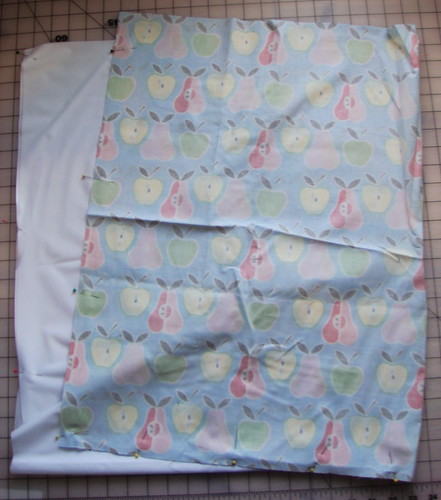
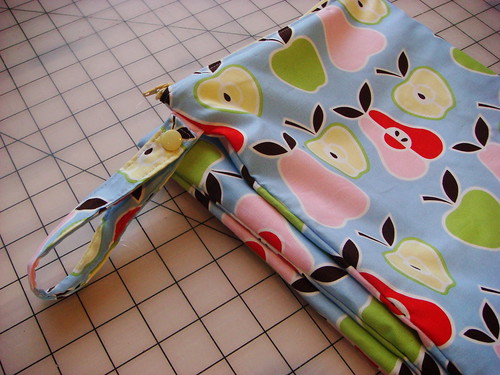
Start by getting your fabric ready. Choose a cute print (usually in cotton, but since this is a wetbag polyester is ok too). For wetbags I use woven fabrics, since stretchy fabrics can be a pain to work with sometimes. Then pick your dimensions. This varies for everyone. Some "small" wetbags are the same size as other's "mediums" and so on, so I just pick the size I want it to be. For this one, I wanted a big one for a weekend trip out of town. I'm using plain white PUL and a fun apple and pear print.
A note about PUL, you can use 1mil or 2mil. I have 1mil that I'm using here, but some people prefer 2mil.
Cut your fabrics so you have two pieces the size that you want (an outside bag of print and an inside bag of PUL all the same size). I'm using the fold to my advantage, but you don't have to. If your print is directional (like my apples are all going the same way) make sure that both pieces are going the same direction. Pin the fabric right sides together on three sides, leaving one of the short sides open. For the PUL, the "right" side is the shiny side.
If you want a handle, cut a piece of the woven fabric roughly 12 x 4 inches. Fold in half lengthwise and pin. If you're doing a closed loop handle (no snaps) sew along the long side. If you're doing an open handle (with snaps) sew along the long side and one of the short sides. Turn right side out and fold over. Pin again. This will add some thickness to the handle so it doesn't get all scrunchy when washed.
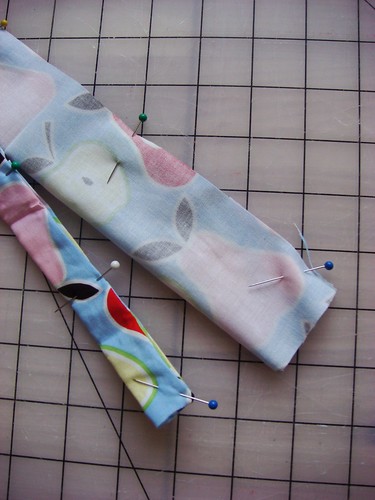
Using your sewing machine, topstich the handle. Fo closed loop do both long sides, and for open loop do both long sides and the closed end to make a nice finished edge.
Next pin the handle in place about an inch below the open edge. For closed loop make the loop now so BOTH raw edges are pinned in. For open loop, only pin in the unfinished edge.
Now you can sew the three edges of both the inside and the outside of the bags. When you sew the print, reinforce your handle. I use the reverse on my sewing machine and just go to town going back and forth over the handle inside the seam allowance. These bags can get heavy, and I want it to hold! This may get a bit thick, so go slowly. It doesn't have to be pretty, it won't show, but you'll be glad of it later! I also make sure to reverse stitch and reinforce all corners.
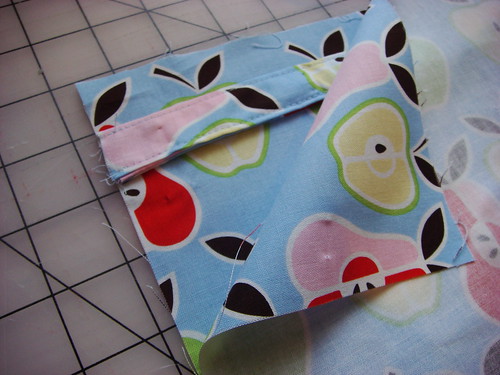
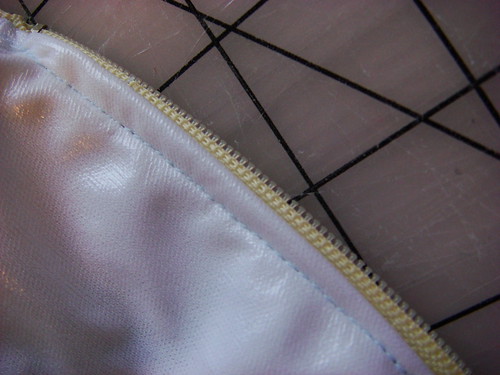
Next, turn the outside of the bag right side out. You do NOT turn the PUL bag, you put it into the print bag, so all the seams are hidden inside. I go ahead and put the PUL bag in now, and just ignore the top of it while I do the first part of the zipper. This picture shows what the two bags should look like before adding the zipper.
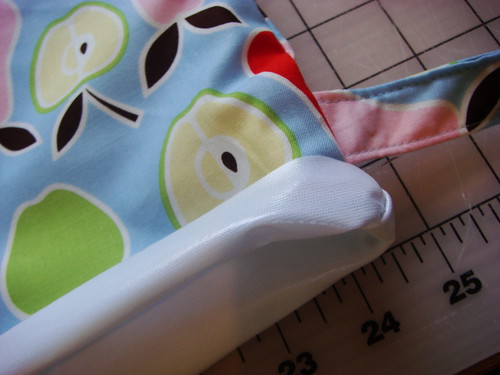
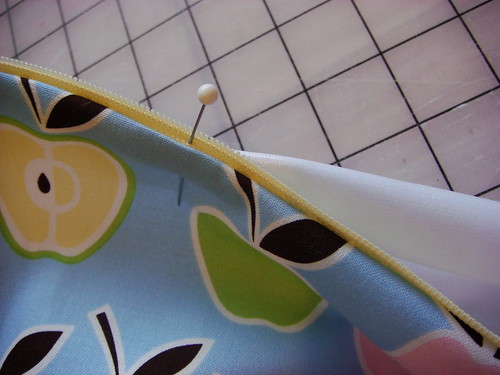
Now comes the tricky part. The zipper. Take your zipper out of the package and unzip it to the end (this should go farther than the fabric by at least an inch). Take the two open ends and lay them upside-down on top of the wetbag, with the loose ends on the same side as the handle.
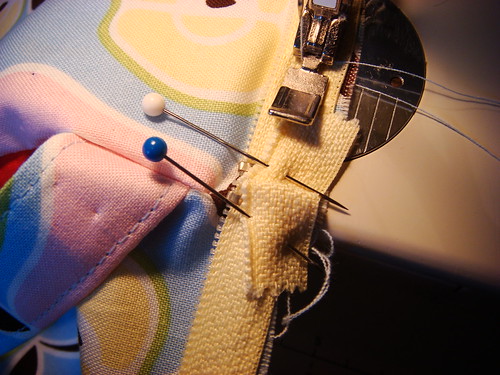
Fold the extra at the end down and start pinning the bottom zipper to the bag. I have a hard time explaining this in words, but hopefully this picture will help. If you turn what you just pinned, it should look similar to the finished edge of the zipper will look like after topstitching.

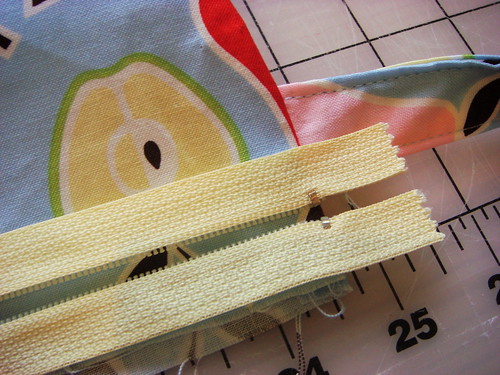
Pin until half an inch from the other end of the zipper. Next flip the zipper so that it's not twisted but the right sides are together on the other side of the bag as well. This looks awkward, and it may take several tries. If you're having trouble, pin down the side in a few places and flip it to see if it seems correct. The long tail at the end will get tucked into the bag, and the zipper pull should not encounter any twists. If for some reason you DO get a twist (heaven forbid) after it's sewn, there is a fix but it's not fun.
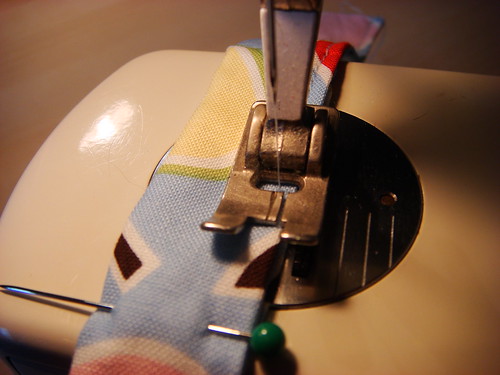
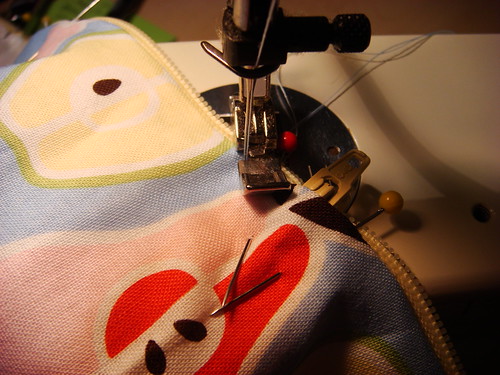
I usually start sewing from the loose ends. I do it this way so I get them to line up nicely. Put the zipper foot on your machine, with the needle on the left side of the foot. I make sure to tack down the folded down edges well so they don't get in the way of the zipper when the bag is done. Sew as close to the zipper as you can, until about half an inch from the other end of the bag.
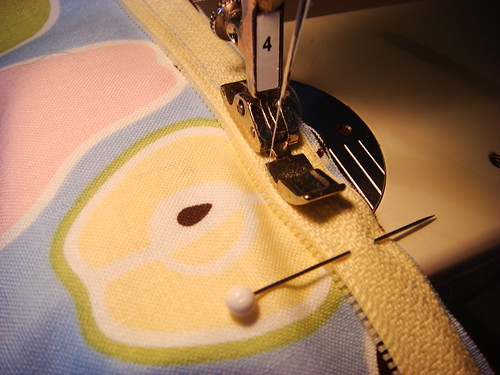
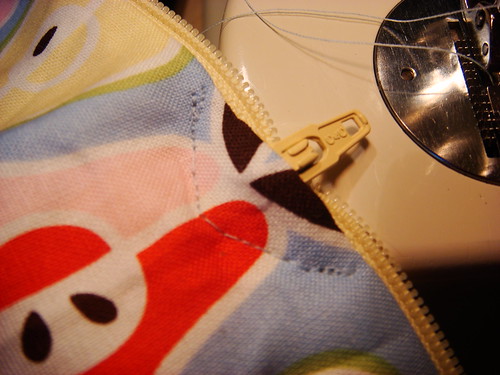
Skip the tail of the zipper, and start again a half inch in on the other side. This will leave about a one inch gap at the zipper tail.
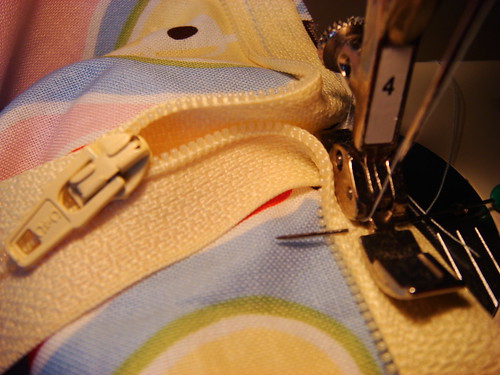
Now flip the zipper and tuck the tail into the open gap. If it's twisted, cut off the end of the zipper and pull off the zipper pull. Fix the twist and carefully put the zipper pull back on. Try it out a few times to make sure you have it centered properly. If you had to cut your zipper you should be fine, it will be closed again soon. Arrange the zipper pull so that it's hanging out at the edge of the bag. I have about 3 inches of extra, but no one will ever see it, so I just leave it.
You're now going to retrieve the top of the PUL bag that's been hanging out inside. Turn the edge under (if you did both bags the same size, this will probably be about 1" long) and start pinning it to the underside of the new zipper. I again start at the loose edges so they line up nicely.
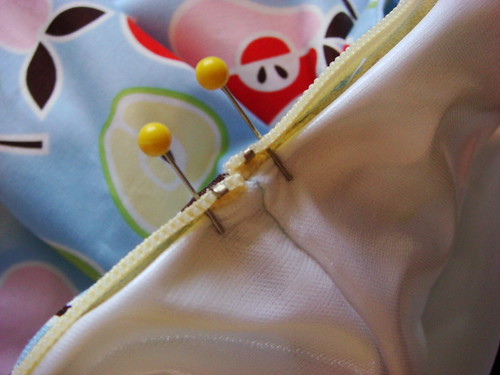
Continue pinning all the way around. I do as my mom always advise, and I "divide and conquer." I pin the loose ends of the zipper, then find the other sides and pin where the zipper pull is, then put those pins together and pin midpoints on the two sides, and go from there. You don't have to do it that way but it helps to eliminate any repinning because the PUL is a little bit stretchy.
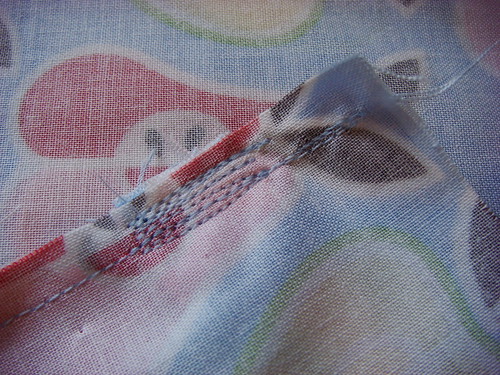
Time to start sewing again. This is the hardest part of the sewing, so go slow and be careful. Sew a V around the bottom of the zipper where the zipper pull is currently hanging out. I do this with my needle on the left hand side and only do the V to start with. Then if I mess it up I can rip it out and redo it.
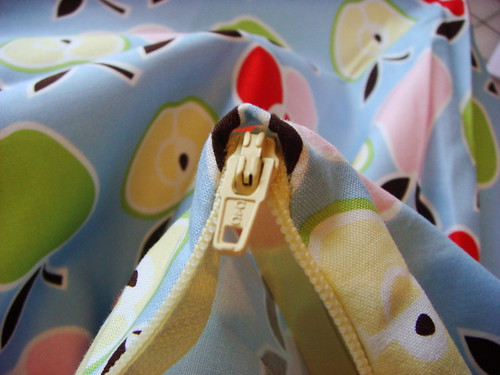
After that portion is done, move your needle to the right of the zipper foot, and topstitch the zipper so that the PUL is attached on the inside as well. I start at one side of the V and go all the way around.

If you're doing a closed loop wetbag, you're all done! If you're doing an open loop wetbag, apply your snaps, and then you're done!
I hope you enjoyed this tutorial, and that it was helpful. Feel free to leave any questions in the comments, and I'll do what I can to help you out!
22 comments:
fantastic
oh i am SO excited to see this! something i have wanted to try out but had no clue where to start. thanks so much for the great tutorial!
I just made this & it was so easy- doesn't look as good as yours but I am so excited! Thanks!
Wow, that's the best tutorial I've seen for a two-layer wetbag. You are awesome! I'm making one right now.
Wish I would have seen this sooner!!!My first 5 bags were pretty gnarly! Your photography is beaitiful and your instructions are so clear!
I am so happy I found this. I was sitting here with my fabric, envisioning it, and I kept trying to figure out if there was a way to put the zipper in FIRST and then sew the edges of the bag and turn it right side to through the zipper, but with the two layers, all I was getting was the vision of a headache! Thanks for all your work!
Excellent Tute! Just made my first wet bag (and first time sewing a zipper) and it turned out beautifully! Thank you so much for the info!!!
This is exactly what I was seeking! Thank you for taking the time to post this tutorial. The photos make it so much easier to understand. I have my fabrics laid out to make one as soon as the children go to bed!
Warmly,
Stacey
www.providencefarmva.blogspot.com
www.whatsoever-things.blogspot.com
Thanks for taking the time to make and post this tutorial! I have a friend that asked me to help her with a few of these and this is SO helpful.
wow this is exactly what i have been trying to figure out! thank you so much!
This is an absolutely wonderful tutorial!! I just completed one of my own, and I had no problem following the instructions! My bag turned out perfect! I LOVE IT!!
Love it! So glad I found this blog and this invaluable tutorial via Pintrest!
What does PUL stand for?
I just made a second bag ( two years after the first) and I came back to your tutorial because it was so clear and I love the hidden seams. Beautiful.
The "V" around the bottom of the zipper gives it a very neat and professional look. Great instructions. Thanks for taking the time to post this.
Thank you for the tutorial. I'd like to make one and am having a difficult time determining how big to make it. I will have two in diapers and will likely wash every other day, so I'd like it to hold at least 15 diapers. I bought a yard of each fabric to use, but that seems too big. Do you have thoughts on how many yours holds and approx how much fabric you used?
I wish I have your mad sewing skills!
I've got to sewing in the PUL but have a question. When you sew the V near the tab are you sewing over the extra 3" of zipper that you tucked in? Or do you move it out of the way/trim it somehow?
I followed this tutorial bc I was tired and didn't want to think about this last minute gift, and I have to say this was the hardest way to install a zipper ever. I should've read it through first, but alas didn't. Much easier to install zipper first, then sew up other 3 sides of the bag, leaving a small opening to turn. Sorry, but won't be making this again. my fault for just reading the reviews without looking at the tutorial.
This is very nice blog because information provided here through the article and the pictures are very effective. Vero Beach Tutoring Because sometimes words cannot explain the things that pictures can and here the words and pictures both are expressing the things in balance.
I’ve desired to post about something similar to this on one of my blogs and this has given me an idea. Special needs Tutor Alpine Cool Mat.
You made some decent points there. I looked on the internet for that problem and located most people will go in addition to with the web site.
percetakan buku online di jakarta
aqur percetakan
percetakan online Jakarta timur
jasa cetak buku murah jakarta
digital printing Jakarta timur
digital printing online timur
percetakan murah Jakarta timur
cetak murah Jakarta timur
cetak online Jakarta timur
Post a Comment